Part 1: Creating the Webhook
Step 1:
Start by opening a new Google spreadsheet.
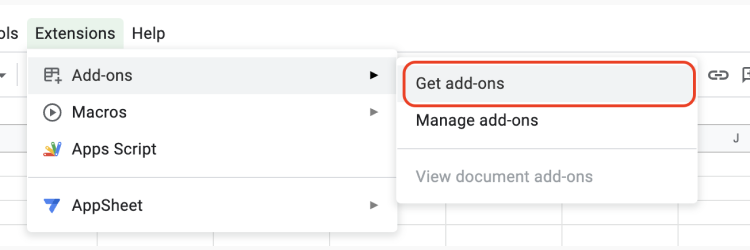
Go to the Extensions tab in Google Sheets and click on it. Then go to Add-ons -> Get add-ons.

Step 2:
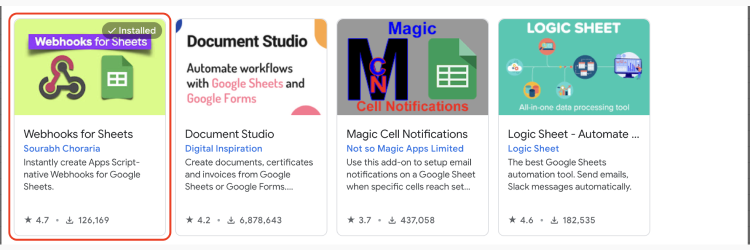
A pop-up for the Google Workspace Marketplace will appear. Type "webhooks" in the search bar, which can be found at the top of the page, and a drop-down will appear. Select the option "Webhooks for sheets."
This will bring up a few options. Select the option outlined below.

Step 3:
This will open the app and give you the option to install it. During the installation process, there will be various points that you will need to grant permission for the app to be installed.
You will then go through the standard process from Google to allow permissions using your Google account. You can read through these permissions if you would like more detail on what is being granted.
Step 4:
Once you have finished the installation process, refresh your Google Sheets webpage. On the right-hand side panel of Google Sheets, you should now notice a new icon for Webhooks for Sheets. If you get an add-on error, close and re-open the sheet and proceed to the next step.
.png)
Step 5:
Click on the Webhooks for Sheets icon, and the following panel will open. At the top, you can select the sheet where you want the data to be pasted.
Since REI BlackBook does not allow you to export lead creation time natively if you choose the option to add a timestamp column, this webhook will run when you get a new lead, and the time stamp can be used as a replacement. Then proceed to create.
.png)
Step 6:
Refresh the spreadsheet. You should notice a new tab called "webhooks." Select that tab and then choose the option to authorize. This will follow the same process as the previous authorization. Then refresh the spreadsheet once you have completed the authorization process. Then on the sidebar, press Next to continue. This will then provide you with the Webhook that can be used inside of REI BlackBook.
.png)
.png)
Part 2: Testing the Webhook in REI BlackBook
Step 1:
Test the webhook in REI BlackBook. The best method for this is to create a new workflow and choose the webhook option. Enter the URL for Webhooks for Sheets into the URL space.
In advanced settings, you can select the fields you would like to export, such as Name and Email.
.png)
Step 2:
Click "Test Webhook" and choose a contact you would like to test with. This contact should ideally have all the fields you have selected under advanced settings in the previous step.
Then press "Test Webhook." Once you see the success message, go back to your Google Sheet.
Once you are back in Google Sheets, navigate to the chosen sheet. The data from the contact should now be visible there, ready for you to use for KPI tracking, etc.
.png)

.png)


